
What is covered in this article?
- Overview
- Creating/Editing Student Interests
- Adding New Interests
- Importing a List
- Deleting List items
- Merging List items
Overview
The ‘Student Interests’ field in Pipeline is a great way to learn more about your prospective families children and provides multiple opportunities to engage with them via a targeted, tailored approach.
Creating/Editing Student Interests
| Note: Only users with School Admin access can make these changes |
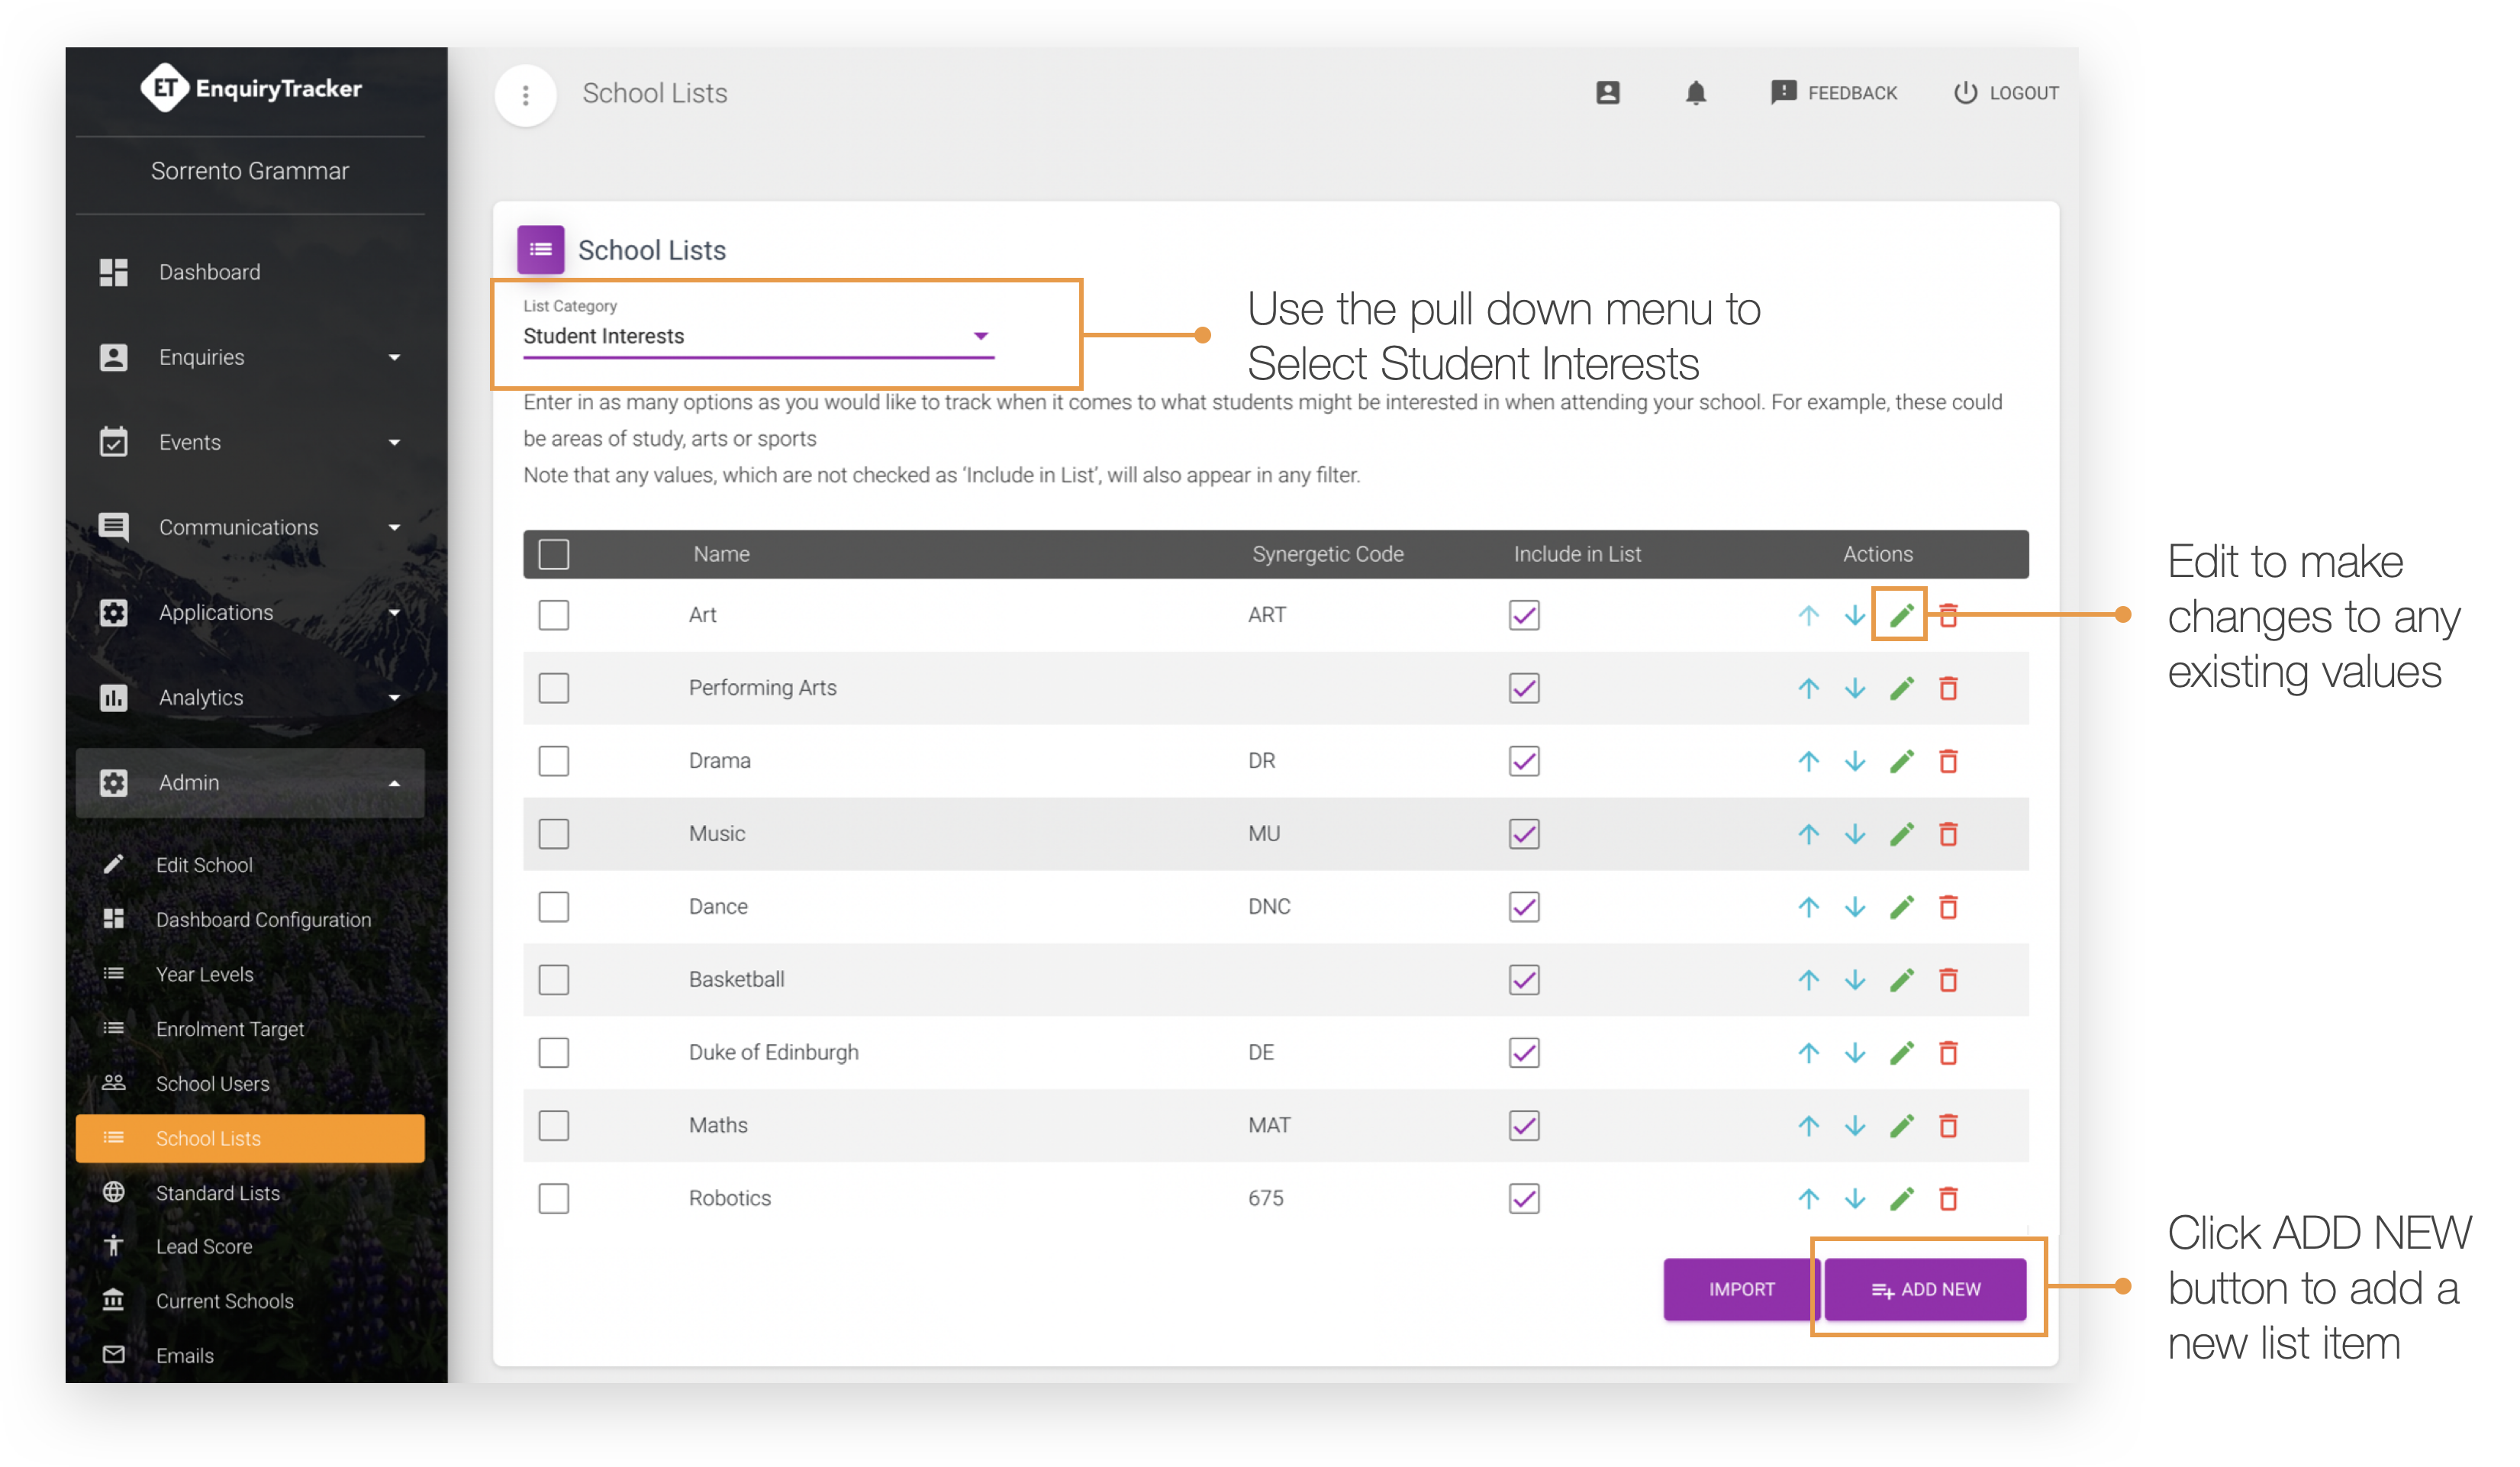
- Go to Admin > School Lists
- Using the List Category menu, select Student Interests
Tip: Enter in as many options as you would like to track when it comes to what students might be interested in when attending your school. For example, these could be areas of study, arts or sports. Note that any values, which are not checked as ‘Include in List’, will also appear in any filter.) - To edit an interest, click on the pencil/’Edit’ icon located under the Actions column.
- Make any desired changes and click the Save button.
- To rearrange the order in which interests are shown in your form, simply use the Move Up/Move Down arrow icons located under the Actions column.
Adding New Interests
- To add a new interest, click the + Add New button at the bottom of the interests table.
- Add your interest title and any relevant School Management System code. Once complete, click the Save button.
Note: For Pipeline, Newly added interests will appear on your forms (Event Registration, Information Pack etc.) by default. If you do not wish for these to appear on your form at any time, simply un mark the Include in List checkbox.
For Apply, any changes will not take affect on any forms unless the form has been republished
Importing a List
It is also possible to import list items in bulk via the upload of a CSV file. To do so, simply create the CSV file using a spreadsheet program such as Excel with the following column headings
- Code -> Use any unique value if you are unsure of what to use
- Description -> Enter in text that describes the interest
- IncludeInList -> Enter in 1 to set the default as Include in List
Save this file using a name that you will remember i.e. StudentInterests.CSV and then:
- Click the Import button
- Select the file you wish to import.
A successful import will result in these items being added to your list along with a pop-up prompt advising of the import’s success. If there is a problem with the file as error message will be displayed with the relevant instructions of what was incorrect.
Deleting List items
To delete one or more interests from your list, either use the red trashcan/’Delete’ icon located under the ‘Actions’ column, or, select multiple items via the checkbox in the list table and click the red ‘Delete Selected Item(s)’ button.
Merging List items
To merge two or more interests into one item, select each interest via the checkboxes provided and click the blue ‘Merge’ button. You will be asked to select which item remains as the ‘Master’. This cannot be undone. Once you have made your selection click the purple ‘Merge’ button.